It is often desired to build a stone arch bridge. Such a structure is scenic and, of course, lends a fine touch to landscaping. The question is how do you go about doing it?
We have provided this short guide as a very general rule of thumb; the details of your construction will vary. We’ve based it on several small bridges we built, including some lessons learned afterwards from the process. We assume no liability for use or misuse of this information, but we do hope this will be helpful to the DIY enthusiast.
Finding a Location
The first thing to do, of course, is to determine the location of the bridge and the amount of waterway it is to handle. If possible, during heavy floods, determine how much water there is roughly. For small ditches it will not hurt anything for water to flow around or over the bridge. This may, however, be very inconvenient as not only will it tend to muddy up any paths and the bridge itself, but it is during heavy flows when a bridge is most useful.
Roughly determining the area of water in the ditch at a given point allows for a calculation of how much total open surface area the arch(es) must have to accommodate maximum flows. It is typically desirable for the underside of the top of the arch to be level with or higher than the banks; however, this can cause a steep grade. We might add that, while with a bit of determination it can certainly be done, we would strongly discourage the amateur from undertaking long spans! Long spans require more precision to stand. Of course, with practice, it will become easier and easier to build bigger and bigger bridges.
Choosing an Arch Shape and Design
Once the location of the bridge is determined, the next step is to create a design, determining the number of arches and the shape they will take. Once this is decided, a little bit of geometry will allow one to determine the shape of the temporary formwork that will be required to build the arch.
A wooden form can be cut out of plywood with slats nailed on top, or, if you have a lot of scrap plywood, you can attach numerous plywood pieces cut to the right shape together, each spaced a few inches apart. Alternatively, rebar or even PVC pipe can be bent and held into an arch shape, saving the need for cutting wood, though the resultant shape will be more parabolic in nature unless somehow forced into the correct shape.
There are two basic arch shapes: the Roman arch, which is simply half of a circle, and the segmental arch, which is a flatter arc than a Roman arch. Other arch types are simply variants and other applications of these two basic arches. For segmental arches, “skewbacks” of some sort will be needed; these are triangular stones on which a segmental arch rests. Laying the stones such that a sloping face is created for the arch to rest on is a valid alternative. Regardless, we’d recommend making a template of the angle needed for this purpose so that the stones used will be approximately the correct shape.
Laying the Foundations
The next thing to do is to lay the foundations. If you are blessed with bedrock that is only a couple of feet or so under the ground you can simply lay the foundations on this; otherwise, for mortared work at least, the foundations must be placed below the frost line. For motarless work the arch can simply be laid on hard subsoil below the streambed, provided the chance of erosion isn’t too high. Dirt seeps between the joints over time and will hold water, causing frost heaving of the structure regardless of whether it is laid on the rock or dirt. If well laid, the masonry should be able to handle this.
When laying the bridge foundations on soil, as opposed to rock, it is strongly recommended to have the foundations under the arch wider at the base than the top so that they present a larger surface area to the soil. Also, we like packing gravel into the soil in some cases to help make a hard, compact resting surface for the foundations.
When mortaring, please note that it takes practice. For looks, avoid globbing it on; it is virtually impossible to remove once it’s dried and, well, sometimes the structure would be more attractive without it.
Also use mortar — not cement! Hard cements can crack the stones because, when freezing and thawing, the stone will have more give than the mortar. We used type N mortar for our mortared structure — and even it appears to have been a little too hard for our soft limestone.
One observation about concrete, by the way, is that its ability to damage stonework appears to be governed by how and where it is used. The concrete scour aprons often used around stone arch bridges, for instance, rarely (if ever) seem to be a cause of damage to the bridge. We have also built an experimental stone arch bridge with cement poured between the stones to make angles. So far this bridge is holding up perfectly. On the other hand, indiscriminately smearing cement over the surface of stonework appears to greatly speed up the deterioration of the stones. Stuffing concrete into a large gap in a masonry structure is also generally considered a bad idea in the long run.
The foundations for the arch are built like a solid stone wall, following the basic rules of masonry. The main key is to try to overlap joints from layer to layer.
Creating the Formwork
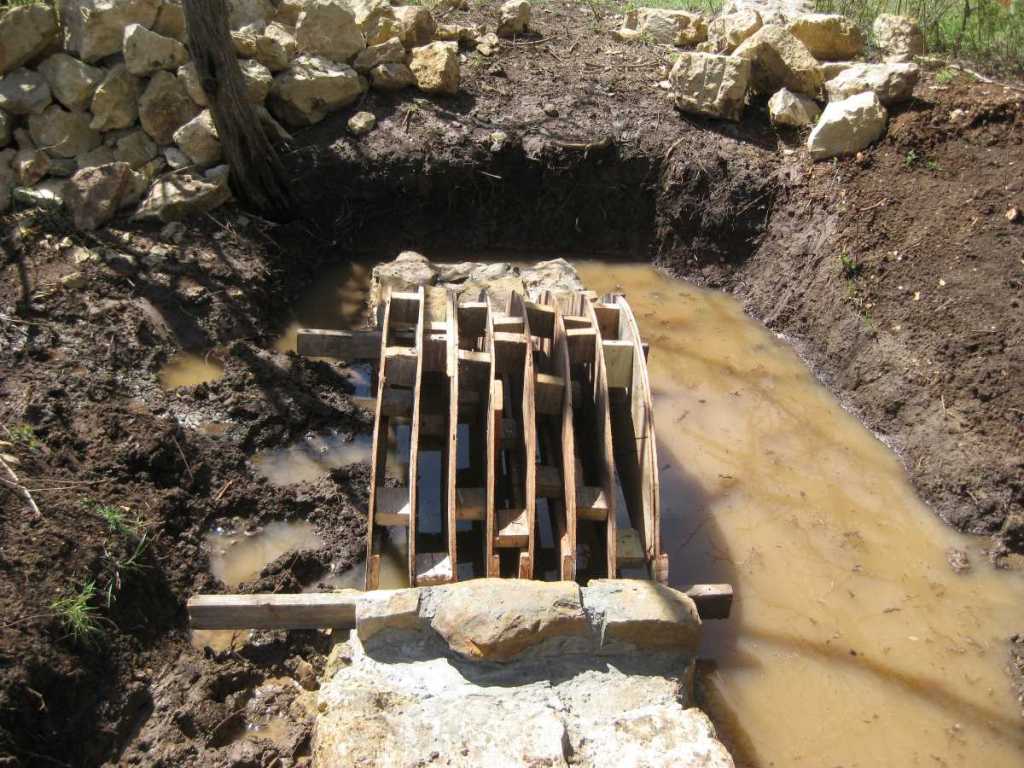
Once the foundations have been built up to the level where the arch is to start, some provision must be made for placing the temporary formwork the arch rests on during construction.
You can add a narrow ledge on each abutment to place the form. Don’t forget provision for removing the form later! For small arches resting the formwork on 2x4s, which were laid with the narrow ends on the ledges, should work out well. When the time comes, it is easy to topple the boards out, thereby dropping the form down.
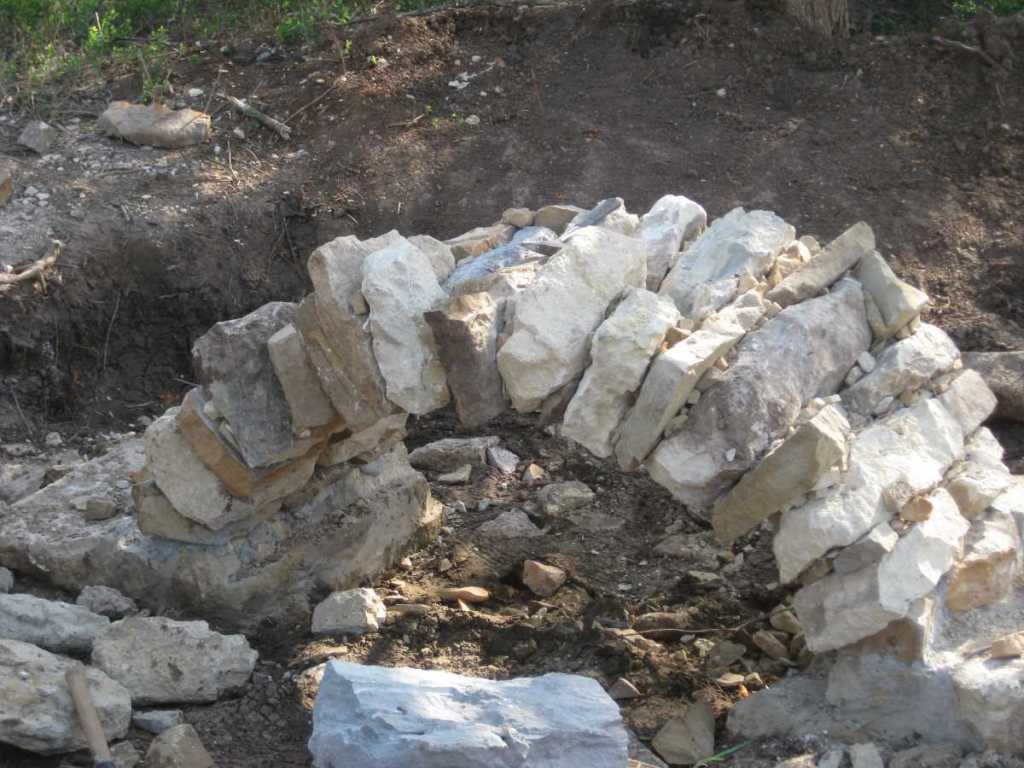
Building the Arch
Remember that, when building a flat arch, the flatter the arch the more stones behind the skewbacks there must be to prevent collapse. Building an arch flatter than a 90-degree segment of a circle for a first-time attempt is probably not advisable; such a flat arc desperately wants to push out and collapse, requiring much care in construction. As a general rule, the flat the arc, the more critical tight fitting of the stones become, simply because flat arcs have less room for “give” if something settles.
When building the arch, it is helpful to use thin stones. This makes the arch easier to shape without cutting stones, see Stone Arch Bridges: Methods of “Turning the Arch”.
Also, build up the arch from both ends fairly evenly. Otherwise it is occasionally possible to have some form of dramatic accident from the grossly imbalanced weight on the arch form. There are several ways to lay the arch stones (see Different Methods of Laying Arches) but regardless of how the arch stones are laid, do try to keep the weight reasonably balanced on the arch form. If you build up the arch all on one side of the form, the grossly imbalanced weight can lead to a sudden dramatic collapse of the form work.

We have not spent much time cutting the stones to fit for any stone bridge we’ve built; we pick out and lay the stones so that they will naturally curve the arch on their own as much as possible. We then use numerous stone chips to help stabilize them. That said, some slight trimming of the ends of the stones will periodically be necessary to ensure everything fits well. For some basic information on stonecutting and associated tools, click here.
If you are using mortar, we’d recommend making a thin (though not liquid) batch, placing it on the arch stones, and shoving stone chips in the joints once the next course of masonry is laid. Be sure to use thick, strong, waterproof gloves to prevent chemical burns or, better yet, gloves and some form of tool to push the chips in. Note that, when you get to the top of the arch, the mortar will want to fall out the bottom; some method of keeping it from seeping through any and all gaps and cracks in the formwork is necessary.
Based on experience, pouring the mortar into the arch after it is finished is probably not the most practical solution, even if it was how many old time stone bridges were built. The final result tends to be messy, and the more horizontal joints are, of course, rather difficult to pour into.
It is possible to build a solid arch without mortar. Mortarless bridges look better, cost less, and can be quite solid. The basic arch building for a mortarless bridge is similar to mortared arch building, only more time is spent ensuring the stones fit well.
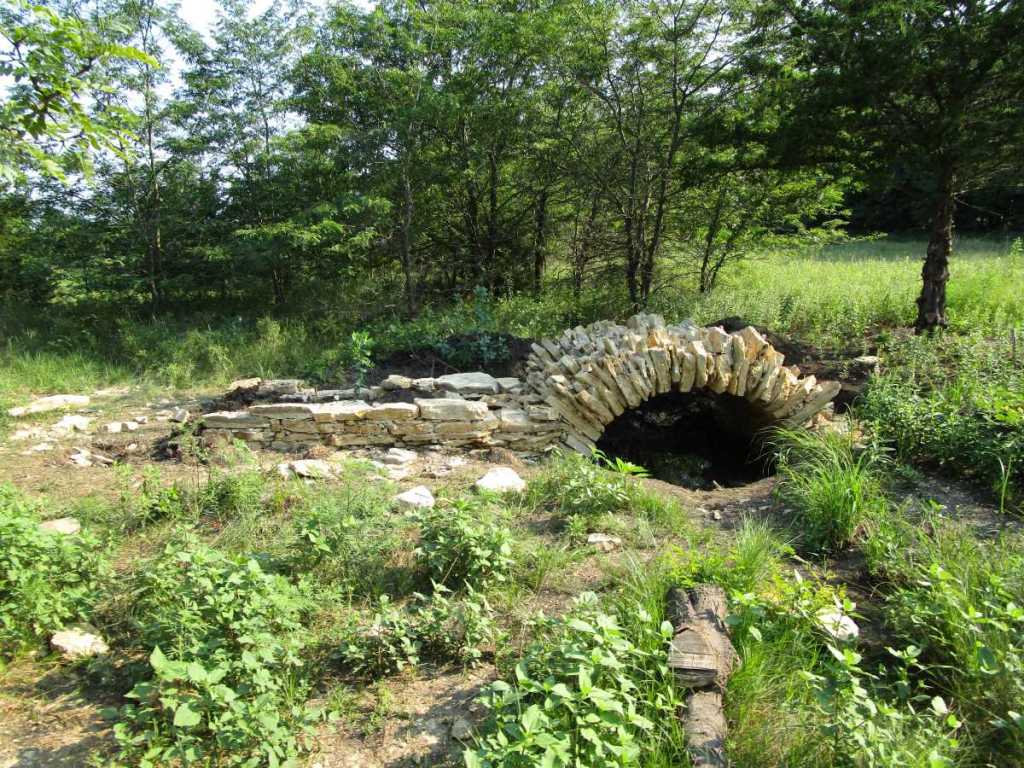
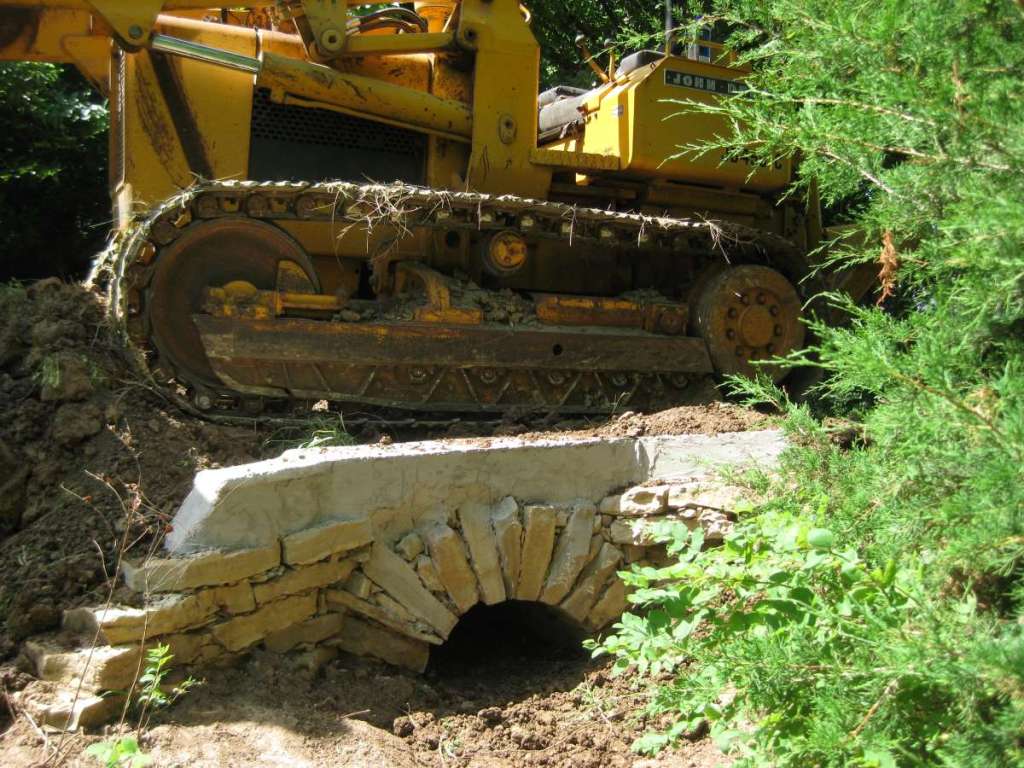
Removing the Form
Once the arch is in place and sufficient weight behind the skewbacks is in place, the form can be removed in most cases. Roman arches with thin arch rings may need additional material against the arch for stability due to their limitations. The form should be removed carefully with minimal pounding and banging to prevent dislodging stones. Care should be taken around a bridge when the form is being removed in case something goes wrong.
The Finishing Touches
How much is left to be done depends on the design of the bridge. Usually, walls are built up on the bridge and filled in with gravel, soil, or some other material, though it may be desirable to add solid backing directly against the arch instead of just throwing in dirt. These fill walls are straightforward to build, and are simply a pair of retaining walls working together. They are built parallel to each other and to the same height, then filled in with material to form a continuous walkway or, perhaps, a ramp should it be necessary to slope up to the top of the structure. For mortared structures, simply follow the basic rules of masonry and build simple walls. For mortarless structures, a little more care will have to be taken to prevent these fill walls from being dislodged by freeze/thaw cycles; more information can be found here. That said, mortarless retaining walls are actually quite easy to build.
The top stones on the bridge should ideally be large and heavy so they are not easily dislodged; alternatively concrete curbing can be poured. For a mortared structure, it is less important that the top stones are massive. For safety, some form of guardrail can be added as a finishing touch; just note that it must be mounted to the stones and not into the joints. Once the top stones are done, and all soil ramps on the bridge smoothed out, the structure is complete and ready for use! With a little practice, you’ll find that stone arch bridges are actually not as challenging to build as they look.
And Now for Some Examples
We always find it helpful to look at stone arch bridges others have built; studying these structures can provide ideas for DIY projects. For this reason, we recommend viewing local stone arch bridges in your area, if possible. Also, check out our lists of Stone Arch Bridges of Butler County, Kansas and Stone Arch Bridges of Cowley County to see some historic road structures ranging from massive to tiny. For further inspiration we also include below a photo gallery of the stone arch bridges we have built.


A well-built stone arch bridge is also a picturesque addition to any landscape. DIY stone arch bridges are entirely practical to build, and can prove quite useful as well.
