Looking for some ideas and suggestions for building your very own stone arch bridge? In this post we’ll go over some construction ideas we have found successful.
Foundations
How deep the foundations should be will depend entirely on the characteristics of the stream and how soft the soil is. If solid bedrock is readily available, use it, for it is the best foundation possible, and the bridge can be built directly on top of it, even if directly at the streambed level. In our area, the clay soil we have is quite hard, so for low-flow ditches, the foundations for mortarless bridges do not need to be more than a few inches below the streambed. If scour is a concern, it is a simple matter to pave the stream with thin, flat stones. For more tips see our post on Building Solid Foundations on Weak Ground. Be aware that if mortar is used, the foundations are best placed below the frost line to prevent undue heaving and resultant cracking.
The Arch
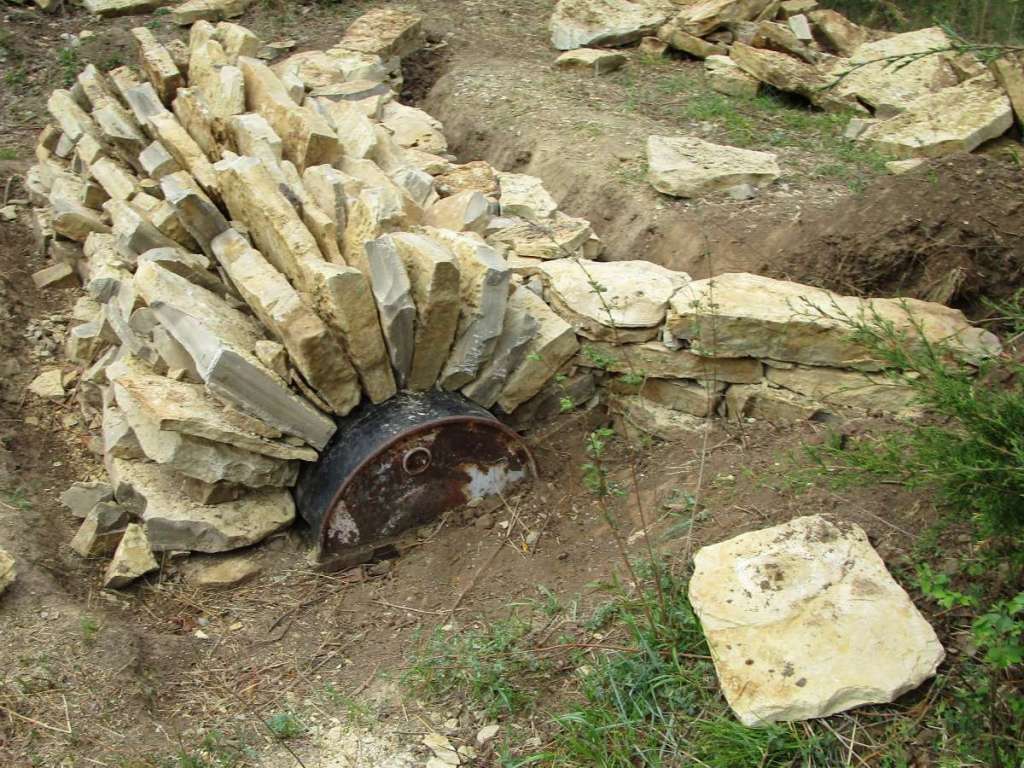
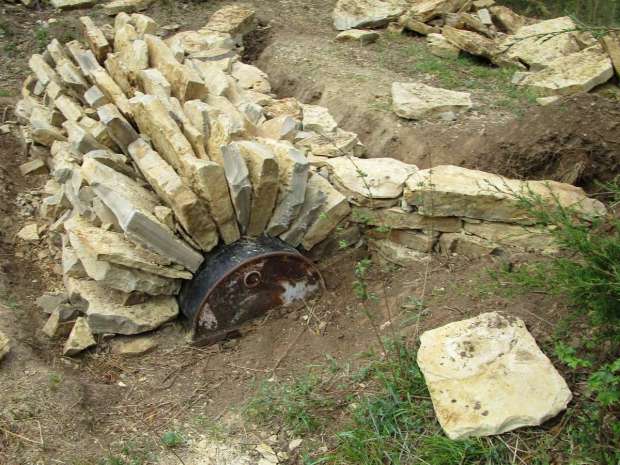
The arch can be easily built if thin stones are used and the arch is made reasonably thick. Simply place the stones on end, ensuring that the stones are thinner at the end placed on the arch form than their upper surface. The stones should be heavily shimmed. It is acceptable to prop up a stone to the correct angle with shims provided that the bottom of an arch stone contacts the arch stone below it. Shim heavily, filling in the nooks and crannies as solidly as possible. That said, above the point where the arch stones rest at a 45-degree angle relative to horizontal, it is easier not to shim the stones beyond what is strictly necessary for them to stay in place until the whole arch is rounded. This is best, as otherwise the stones will tend to be wedged up more and more as the shims are added, creating an overall looser fit of the arch stones and the shims both. Once all the stones are in place, the shims can and should be added solidly.
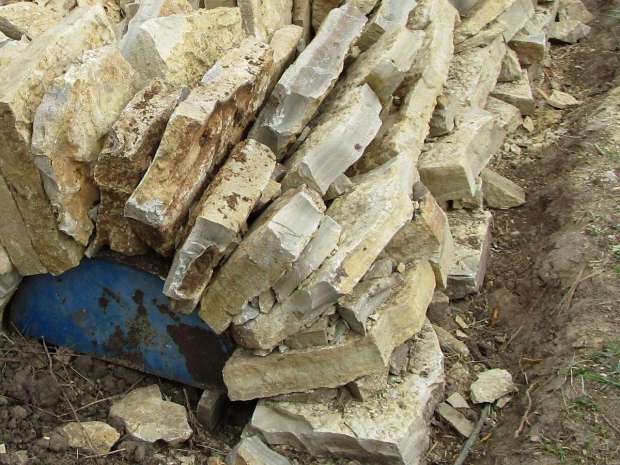
As far as the centering required to support the unfinished arch is concerned, the possibilities are almost limitless; all that is required is that the form provide the arch with an overall steady curve as opposed to a series of flat surfaces. If mortar is used, it is still best to shim the bridge heavily. Shimming the top part of the arch will be a little more tricky, as the mortar must be added between every stone and, as mentioned above, shimming is easily done after the arch is rounded. Extra care should be taken to ensure that pushing in shims does not shift the stone being shimmed.
Backing
Backing the arch with solid stones is an outstanding way to significantly strengthen the bridge. Rather than filling in behind the arch with dirt, a masonry backing can be built to interlock with all the nooks and crannies behind the arch helping make the arch one firm, solid mass. The masonry backing also helps keep shims from working out under vibration, and will take some of the load off the arch as well.
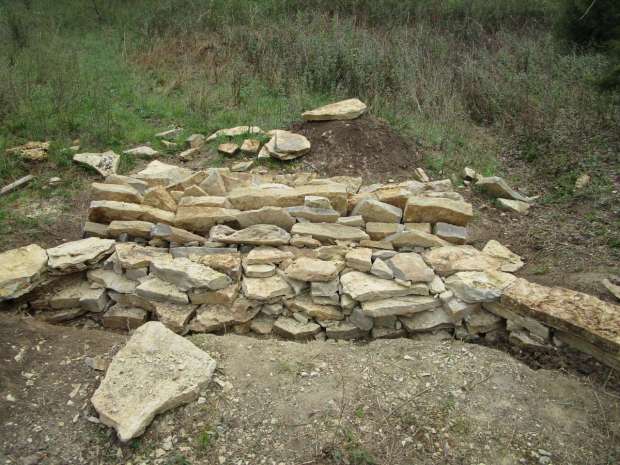
The backing need not be painstakingly built; simply shimming up the backing stones to prevent them from rocking as much as possible will likely be sufficient.
Wing Walls and Approaches
For a small arch, wing walls that jut out from the sides of an arch at about 45 degrees are easily constructed and can help make the bridge easier to use. Regardless of whether a straight approach or 45-degree wing walls are used, the main trick to success is to ensure that these walls have a gentle tendency to lean into the fill they are holding. If a solid masonry backing is used, these walls will be far stronger, but should be built to interleave at least slightly with the backing.
Be sure to shim these walls well, regardless of whether or not mortar is used.
Fill
If the fill is added to and above the level of the top of the bridge, this extra weight will help keep everything stable, especially if the bridge is mortarless. Particularly if the bridge is to carry heavy loads, be sure to pack down the fill for about every six inches of dirt added. By packing the dirt down again every time six inches of dirt is added, undue settling will be mitigated.
