
Rubble masonry is a versatile class of masonry, for it allows for the use of a variety of sizes and shapes of stones with minimal trimming. Just as rubble masonry can be used to build stone walls, rubble masonry can also be used to build an arch.
Rubble Arches: Overview
Rubble arches can be quite strong, even though a strange variety of stone sizes and shapes are used.
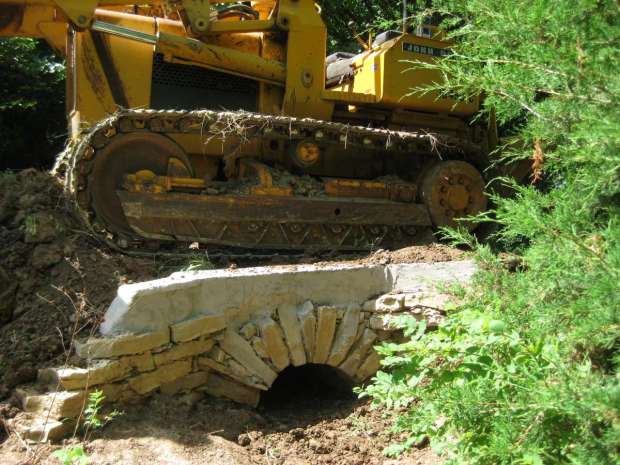
Rubble arches still rely on the arch stones being placed neatly along the curve of the arch. The fact that the stones are largely uncut and are therefore a variety of shapes and sizes is what makes the rubble arch different from other arches with well-cut wedges of stone. A good rubble arch can actually be built much like a rubble wall, the only main difference being that an arch is, of course, curved, while a good stone wall is straight. Rubble arches can be surprisingly strong, as the stones, being either largely uncut or roughly trimmed, tend to break along their natural weak lines. Thus, the stones in a rubble arch will typically be used in their strongest natural form.
Laying Rubble Arches
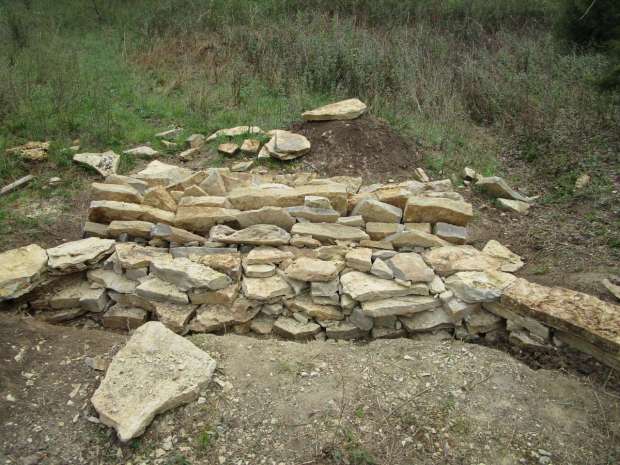
Building rubble arches is easy. Just as for a rubble wall, shims are allowed. A rubble arch can be built with a variety of randomly shaped stones, but using flat slabs makes building the arch far easier.

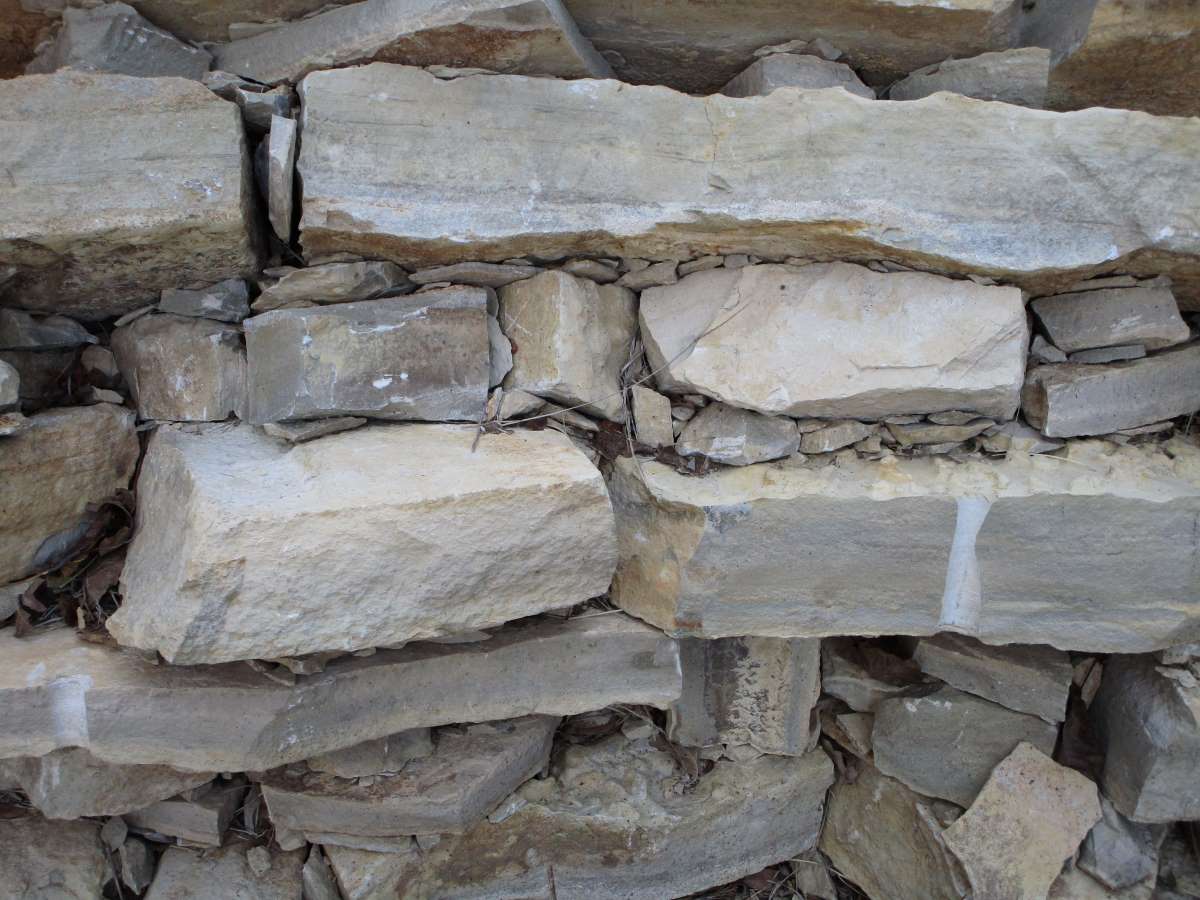
The main consideration in building a rubble arch is to place all stones with their natural tapered side down. For those in limestone country where thin slabs of limestone are what is available, one cannot help but to notice that the stones are flat. Actually though, the stones are not as flat as they seem. Almost all stones have a natural, distinct taper, even if this taper is slight. The trick, then, is to place the thin end down, and shim up as needed.
Shimming Up
Shimming up a rubble arch is important, regardless of whether or not mortar is used. The shims ensure solid contact between stones. Furthermore, shims can be used to help make the curve of the arch. In fact, where heavy shimming is needed to create the round shape of the arch, the shims themselves essentially form small-scale masonry between the larger arch stones.
To ensure the shims stay in place, care needs to be taken in stone selection to ensure there are no large gaps between the ends of the stones placed against the centering.

It may be found that it is difficult to find shims that will satisfactory stay in the last inch or two at the outer ends of the arch. This is fine, just increase the thickness of the arch as needed to compensate, to ensure adequate effective arch thickness. How much shimming needs to be done will depend on a variety of conditions. That said, some good, broad rules to remember are that a Roman arch will likely depend more on shims than a segmental arch; the thinner the arch stones the fewer shims will be needed; and the larger the span, the less each individual arch stone will need to be shimmed up to an angle. The shims are easily created by breaking up small stones.
Backing
It may be desirable to add solid backing to at least the lower parts of the arch if it is heavily shimmed up. Solid backing consists of masonry laid up against (and perhaps interleaving between) the stones of the arch. This solid material helps prevent shims from being vibrated back out of the arch, and can also act as shims in its own right, depending on how it is laid.
One other advantage of solid backing is that it can significantly improve the stability of the spandrel walls of a stone arch bridge.
