
Choosing and trimming stones for a stone arch bridge is not, perhaps, as much of a challenge as one might at first suppose, certainly if you have reasonably thin slabs to work with. Please be aware that the methods of cutting stone tend to vary depending on the properties of the stone used. You may need to adapt your own methods from what is shown in these posts. The rock we used is an unusually hard, almost flinty, grade of limestone with a crystalline structure. This rock tends to shatter into shards like flint, but is not quite as hard as true flint. By the way, don’t forget the safety glasses. Especially if you are new to cutting rock, gloves are recommended to help prevent various injuries.
Work With the Stone
First thing first: Most stones have a natural wedge shape to them. Rare is the perfectly flat stone, and a close look often reveals a subtle wedge shape to the stone. If the stone is sufficiently tapered to fit neatly in the arch, there is no need to bother cutting the stone beyond what is required to even things out a little. Secondly, if you are using very thin stones or requiring rather steep angles in the arch, it may be best to lay thin slabs on the arch form, prop them up at least temporarily with rock fragments as needed, then come back later with a custom cut wedges that can be hammered into place between the larger slabs. While constant and frantic hunting for “the” perfectly shaped stone is unnecessary, it is always a good rule of thumb to start with a stone that naturally lends itself to the spot where it is placed in the arch. While you may need to trial fit a few stones, as you get more practice, you will become better and better at “spotting” the right stone for the place.

Even if you do have to trim rock, it is always a good idea to start with a rock that already is at least a moderately good fit for the location at hand. A rock that at fits at least fairly well will be far easier to trim to size than a rock that is totally the wrong shape. One final consideration that is probably obvious by now is that the more rocks available to choose from, the faster and better the results will be.
Pounding Stones in Place
When building an arch, it may be necessary (and even beneficial) to use stones that are perhaps a hair too large. These stones, provided they are at least reasonably the right shape, will result in a tight, strong arch. The keystones will generally need pounded in place no matter how you lay an arch. Depending on how you are building the arch (see Different Methods of Laying Arches) you may end up pounding every stone in place. Before you start pounding, be certain that the stone is not too large to fit into the place you are hammering it into. If, during the hammering process, the stone ceases to move into place any further, the stone is too large and will need removed and trimmed as needed.
When pounding stones into place keep in mind that unless you cushion the harshness of the hammer blow, you will end up breaking off pieces of stone. Actually, for stones with weird protrusions, if you pound them in directly with a hammer on the projecting piece, in this fashion you can smooth the stone out. Just be careful not to overdo this or you may start breaking other pieces of the stone. To cushion the blow when it is not desirable to break pieces of stone off, use a simple block of wood between the stone and the hammer. A 2×4 piece at the minimum is desirable, though a 4×4 will last longer before it splinters.
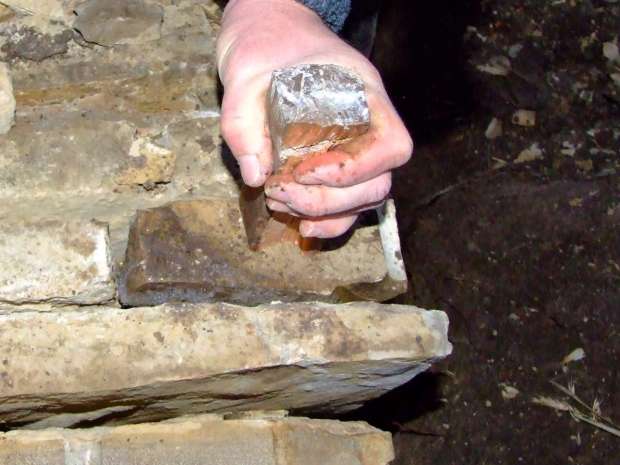
Replace the wood once it splinters into pieces too small to use. For stones pounded into tight crevices, a 2×2 on end or some other narrow sliver of wood can be used, but you will need to pound relatively lightly to avoid splintering the wood. Make the wood long enough that you can hold one end without risking mashing your fingers.
One other thing to be aware of is that when pounding stones in place other stones sometimes loosen up or slide away slightly. After a heavy pounding session, it is advisable to go over the immediate stonework and lightly pound everything into place as needed.
