
Grouting a rubble arch is easy once one has the knack of it; until then, it is usually a messy job. In this post, we will look at some of the details that go into preparing a rubble arch for grouting and then how the grouting itself is accomplished.
How the Process Works
The idea of grout is to fill all the nooks and crannies between the stones of the arch. To accomplish this, two main requirements will have to be met. First, there must be provision for retaining the liquid mortar in the arch. This can be done either by making the form at least somewhat watertight, or by bedding the first couple inches of the ends of the arch stones in mortar, which hardens and then waterproofs the arch. The ends of the arch should be pointed up before grouting as well.
The other main consideration is how liquid the mortar should be. More liquid batches will fill in the gaps better, but can shrink when they dry. It will also be harder to keep the liquid in the more horizontal joints of the arch. In the final tally, the mortar should be decidedly runny while still having as high a percentage of mortar mix to water as possible. It is strongly advised to do this with the stones dry, as the stones will start to soak up the excess moisture from the mortar. This will make the mortar stronger and improve the bond.
Grouting the Arch
To grout the arch, mix a runny batch of mortar. This is done by adding mortar to a bucket of water and stirring until the mix just begins to show signs of stiffening. The mortar should be just thick enough that it can be shoveled in a little at a time with a trowel. For joints that are simply too tight to shovel grout in with a trowel, make the grout thinner until it is as thick as it can be while still being a liquid. Then pour the grout into the joints with a measuring cup or similar container.

Unless simply too runny, the grout can be easily poured into the joints with a trowel, and the trowel can also be used to help tuck it into the arch.
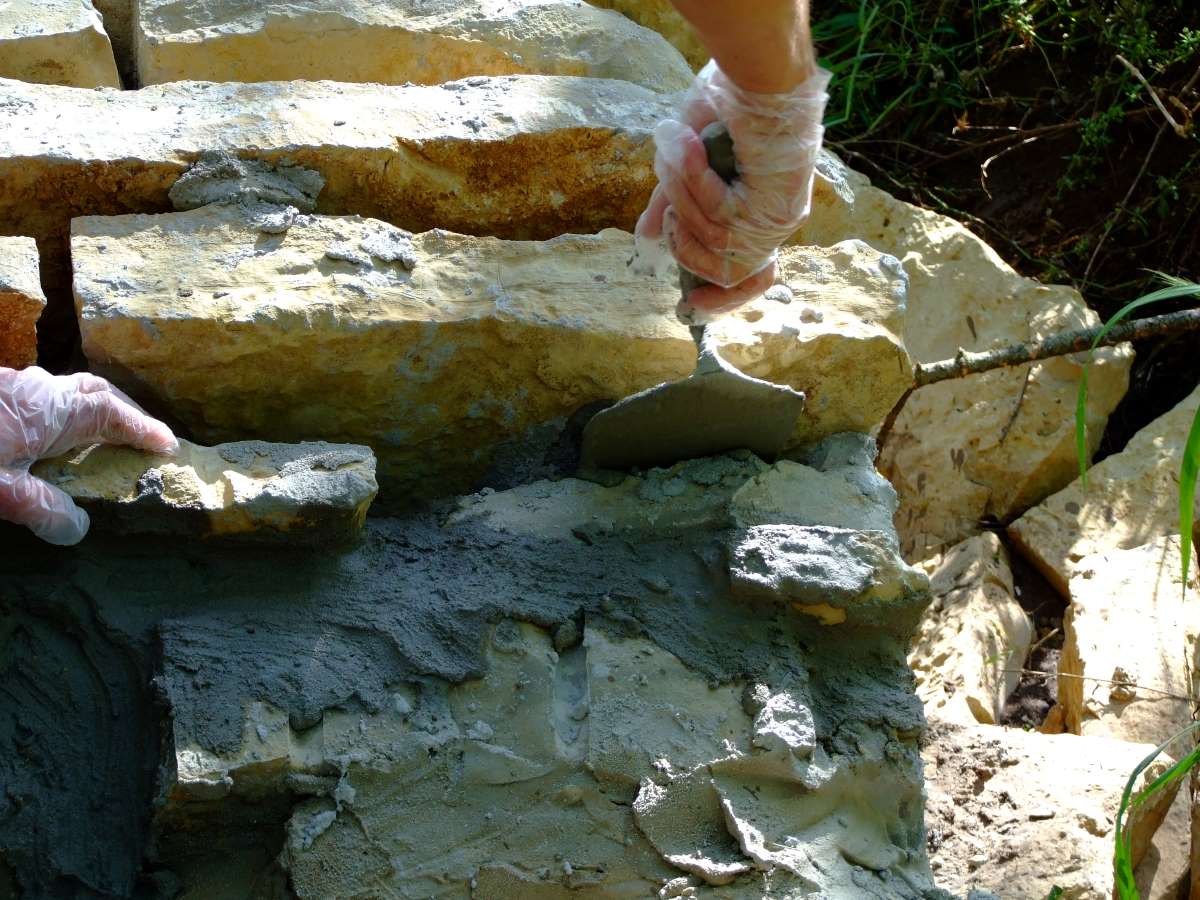
During the grouting process, stone fragments should be added into the joints. Add the grout first, then shove in with your fingers (which should be gloved to prevent contact with the caustic mortar, by the way) the chips until you can no longer shove the fragments below the surface of the mortar. A hammer can also be used to tap the chips into the mortar, though this can cause some splattering of the grout.

Once the joints are filled to the top of the grout with stone fragments, add more grout, alternating between grout and stone fragments until the joints are full. It is a simple process, really, and with practice can be done to achieve outstandingly durable results.
