
Often, a stone will not quite fit into place with perfect precision. Fortunately, trimming the edges of rock is easy. The key is to have the correct tools. Keep in mind that different rock types will respond slightly differently to tooling and adjust your technique accordingly.
Tools
You have several choices of tools. A bricklayer’s hammer is probably the single most useful tool you can buy. It is a simple, light hammer with a sharp cutting end and a blunt end that is also used for trimming. Lightweight, small, and portable, this is a versatile tool.
A heavy hammer is useful, too. For general use, the peen hammer is versatile; the tapered end can do some rough cutting and, of course, the sledge end can be used to strike chisels or knock off pieces of rock. A 3-lb hammer seems standard and useful. When choosing hammers, any kind of handle will work. That said, a fiberglass handle is tempting for its durability, yet a wooden-handled hammer seems to give better, more consistent, cleaner results. Buying a separate, slightly heavier (maybe 4-lb?) hammer for pounding arch stones into place is recommended, especially if your chisel hammer has a wooden handle; for pounding arch stones a fiberglass handle works better and is far less likely to break.
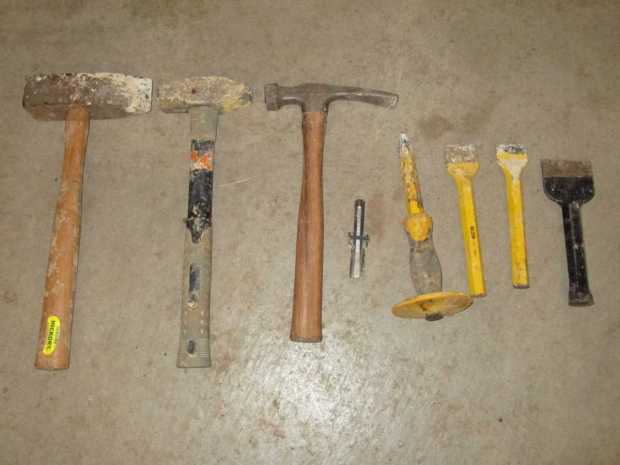
A final tool consideration is the chisel. Basically, what chisel you use is dependent on the rock you use. Sandstone can be easily cut with a conventional chisel. Hard rocks seem to do better with a blunter chisel that is tapered only on one edge. Trimming limestone traditionally was done with a toothed chisel.
For large cuts you want a wide chisel, while for precise work you want a narrow chisel. For really fine work, especially when using hard rock, a pointed chisel may be preferable. The rather blunt so-called “pitching chisel” is intended for smoothing out surfaces on a stone.
Basic Chisel Cutting
A general rule of thumb with trimming is to keep in mind that the more you work the rock, the more likely it is to break somewhere not intended. Again, it is best to use a rock that already is a fairly good fit in its own right to minimize cutting.
Basic cutting of large stone chunks with a chisel is fairly straightforward. When cutting a thin rock with a chisel, keep in mind that it is best to cut from the thickest edge of the rock that will split the rock into the desired shape. Otherwise, the stone is more likely to shatter in a random direction than to split along the desired line.
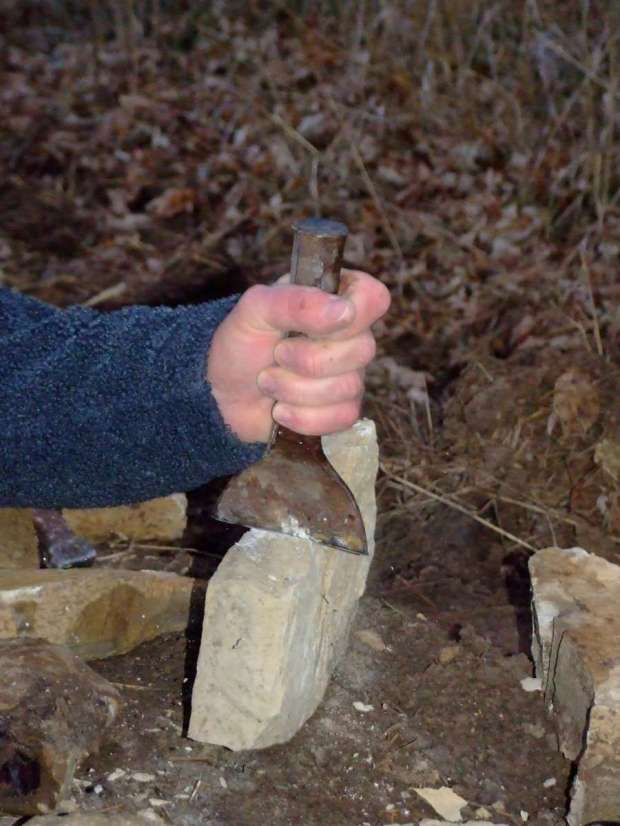
To cut, simply continue hammering until the stone breaks, using even, steady blows. Don’t strike too heavily, or the cut won’t be clean. If the stone is considerably wider than your chisel, score the line of cut, and then move the chisel up and down this line striking it after every move. If the chisel works so deep into the rock before the rock breaks that the chisel is hard to control, either use your hammer to break off excess rock or start the process over from the other side of the stone.
