
The bricklayer’s hammer is suitable for more than cutting straight lines. With it, you can even cut stone wedges for use in arches.
Cutting wedges of stone is not actually as difficult as it may sound, although considerable practice may be required in order to achieve more-perfectly-fitting wedges. Furthermore, it is more easily done with relatively narrow slabs. However, with practice, it will become easier and easier to work larger and larger stones. Don’t forget, by the way, the safety gear as needed. When hammer cutting stone, there are always flying fragments of rock, which are best kept out of eyes. Then too, there is always what invariably happens to your fingers if you by chance miss the rock with the hammer.
How It Works
Basically, cutting stone wedges with the hammer consists primarily of flaking off small fragments of stone from the surface of the rock to an increasing depth the further towards the small end you go. It is strongly recommended working with the rock, however. In other words, when shaping a stone wedge, make the rock’s naturally tapered end the tapered end of the wedge. This makes the cutting much simpler and quicker.
To Start
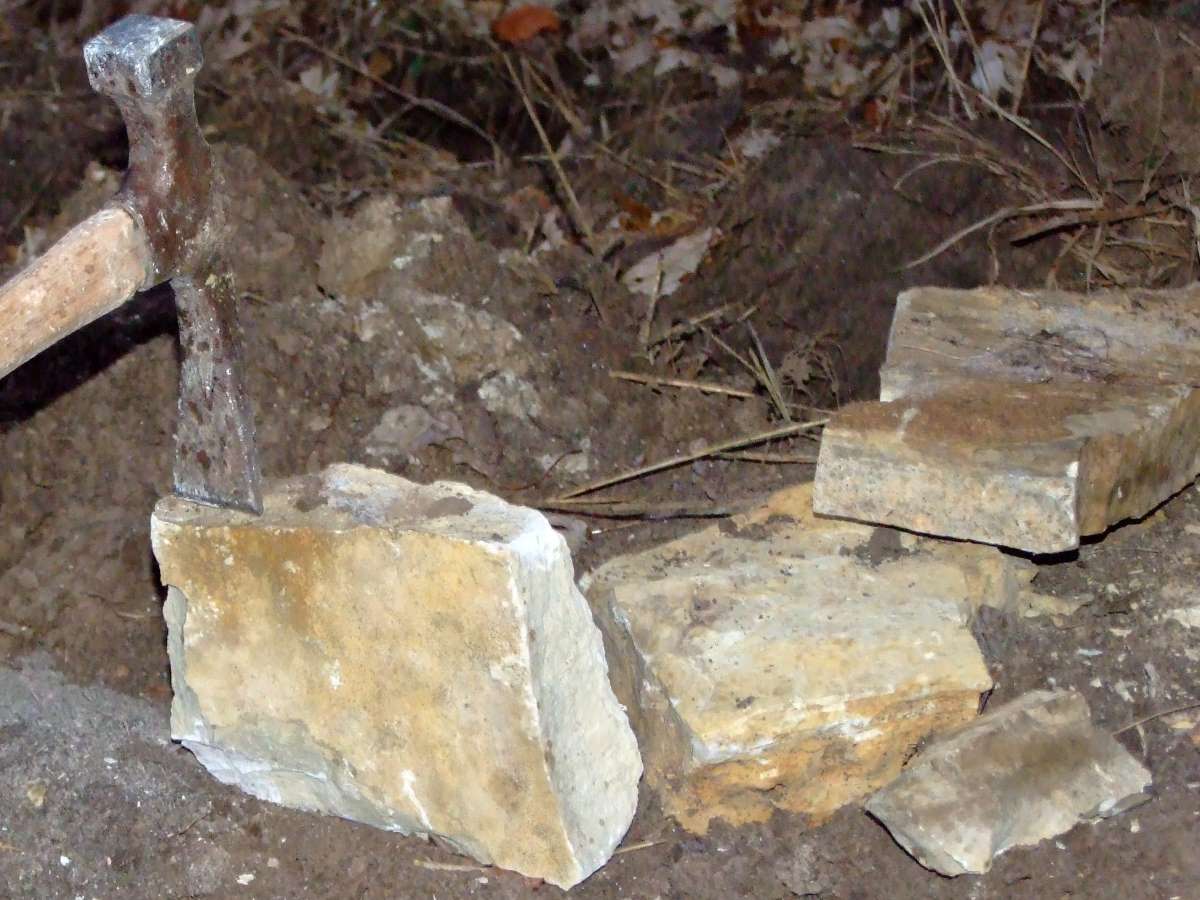
To start, it is best to begin by essentially cutting drafting marks around the edge of the rock. This drafting is quite simple. Determine the desired slope of the wedge, then mark as needed the outline of the wedge shape on a (relatively) rectangular slab of stone. Use the chisel end of the bricklayer’s hammer to cut the tapered end of the stone to its proper width. This is easily done by holding the stone on end and hacking away along the desired line until the end flakes off. Repeat the process along the sides of the stone. (The exact order is not important, just be sure to have a rough draft all along the edges of the stone when you are done.) You should now have a fairly rectangular slab of stone that is roughly wedge-shaped along the edges. Now (and this takes a little practice) use the chisel end of the hammer to start flaking away the middle portion of the rock down to the level of the drafts. The key is to hold the hammer such that all strikes are made nearly, though not entirely, parallel to the surface of the rock.
A Practical Example
Here is an example of how we cut a wedge-shaped stone for an arch. Since this was for an unusually small span (2 feet), we opted for placing large slabs with their naturally tapered end down first, then pounded small wedges like the one we show being cut between the larger stones. Later, we found we could create even better results by cutting the bottom two or three inches of the big slabs into tight-fitting wedges first using the same procedure outlined above. To fill in the remaining gaps, we pounded in more small wedges between the stones as usual.

The first step is to pick a stone that is as close to the right width as possible. The gap we chose to fill is seen in the photo above. Note, by the way, there is already a smaller wedge at the bottom of the hole. It is perfectly acceptable to use multiple wedges one above another as needed. The stone to be used for the wedge should be selected such that it just fits into the top of the gap with no trimming. If such a stone cannot be found, and a stone too narrow must be used, two wedges side by side will be needed. If the stones available are too thick for the gap a thick stone will need to be trimmed down. In the photo below can be seen the stone we used. It was initially too long, so we cut off one end before cutting it into a wedge.

Start by cutting your outer drafts. The key is to strike the stone along the desired line of cut with the cutting edge of the chisel as shown below.
The end draft is the easiest to make; you will need to hold the stone on end and cut it to the desired width. Incidentally, if too much of the end of the stone flakes off during this cutting, just cut off the flat part of the end of the stone until a wedge shape is regained.

When we were done drafting the outer edges on this rock we had a rock that was already pretty close to the desired shape, though with a pronounced lump in the middle.

To remove this lump, we began to flake away at the stone with the chisel end of the hammer. The easiest way to start is to hack away at the pronounced protuberances as shown in detail in the photo below.

Once the obvious projections are gone, most of the fine tuning and smoothing is done by striking the rock lightly, nearly head on while providing a decided scraping motion using the chisel end of the hammer. Striking the stone with the entire flat edge of the chisel will flake off pieces of the surface and overall smooth out the surface of the rock. Using the corner edge of the chisel will tend to dig down deeper, allowing for larger alterations in the stone’s surface. With practice, you will provide a fairly smooth, uniform sloped surface in this fashion.

Trial fit the stone often, and when it seems to just fit snugly in place you are done trimming.

Use a hammer and block of wood as needed to pound the stone into place a shown in part one of this series. Any gaps between the stones can be filled in with stone fragments and shims as needed.
