
In our previous post, we discussed arch theory, and how the arch transfers compressive forces through itself. In this post, we will discuss some practical applications of this theory and other useful matters for building stone arch bridges.
An Empirical Formula for Arch Thickness
Based on observation of successful stone bridges and an old empirical formula for arch thickness, we have created our own empirical mathematical formula for determining the arch thickness of a new stone arch bridge design:
Take the square root of the span (in feet) and divide this number by 2.5 for your arch thickness in feet.
The above formula is a very successful one, and results in strong bridges without heavy excesses of material. However, like all such rules, it is important to keep in mind some boundary conditions:
- The rule is intended only for rounded arches down to a 90-degree segment of a circle. It is not intended for basket-handle arches, Gothic arches, or very flat segmental arches.
- Keep in mind the limitations of Roman arches (see below). The rule will work for small Roman arches, but for larger Roman arch bridges the fill should be added before the falsework is removed from under the arch. Also consider building the arch tapered; in this case use the rule to determine the arch thickness at the keystone.
- We assume no liability for the use of this rule.
Small Arches
One other consideration in stone arch design is that many historic authorities recommend never building arches thinner than 1′ in thickness, regardless of what the recommended empirical formulas suggest. This isn’t because an arch thinner than 1′ won’t stand; it’s more of a practical consideration. Very thin arches are rather tricky to build well, and under heavy loads the weight of a thicker arch helps stabilize the otherwise relatively lightweight small bridge. For a footbridge, this consideration will almost certainly not be a concern, at least if the build is of reasonable quality.
An Interesting Case
While many arches can be made to the thickness specified in the above rule, a freestanding Roman arch will need to be fairly thick for stability. This is because the natural line of thrust for an arch (a catenary) and the Roman arch (a half-circle) are two very different shapes. The reason for making the arch thicker is to ensure that the arch is thick enough that the line of thrust is contained well within the arch, despite the two shapes being substantially different.
So how thick should a Roman arch be? A Roman arch cannot be built freestanding with an arch thickness less than approximately one-eighteenth of the span. However, such a structure is a precarious one. A Roman arch with an arch thickness of about one-sixth of the span will always be stable, at least freestanding.
A Catenary Within the Arch
As explained in our previous post, the reason making the Roman arch thicker works is because, although the force line is a catneary, if the Roman arch is thick enough, a catenary force line can still fit within the structure. It will be noted that a catenary drawn within a Roman arch will tend to pass relatively close to the edges of the arch in places. This behavior of the forces involved seems to be confirmed by observation of small crude test arches; even using loose masonry with large gaps between stones the arch can be stable. Why? Because, as long as the gaps are on the opposite side of the arch from where the catenary force line tends to lie, the forces still travel through the arch well; the rest of the material does little in a freestanding structure, even if the arch stones are precision fitted. If there are excessive gaps in the masonry on the side closest to the catenary force line, the structure will be unstable. Of course, under load the force line changes, which makes thicker arches more accommodating for the conditions found in a stone bridge.
Keeping the Catenary Within the Arch
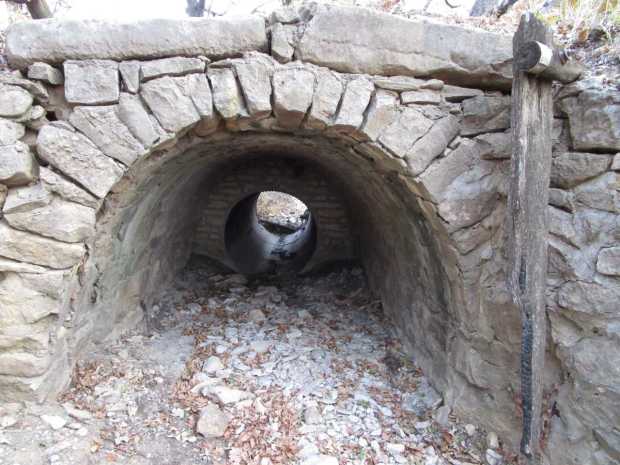
Basket-handle arches have the same weaknesses as Roman arches, only more so, as the shape is even further from a catenary. For this reason, many basket-handle arches are built tapered, with the ends of the arch being extraordinarily thick. The Roman arch can also be built tapered with success; see the photo above. The idea is that by making the ends of the arch thicker than the top of the arch, the line of thrust can be contained within the arch without having an increased “hump” over the bridge due to excessive arch thickness at the keystone.
Both Roman arches and basket-handle arches can be built to stand in a completed stone arch bridge even if the arch itself cannot safely free-stand. This is done by adding the fill and spandrel walls and then removing the falsework. The weight of the fill shifts the line of thrust to within the arch, ensuring stability. All that said, it is usually best to make the arch thick enough (or tapered) such that the line of thrust is inherently contained safely within it, even without fill.
Practical Designs
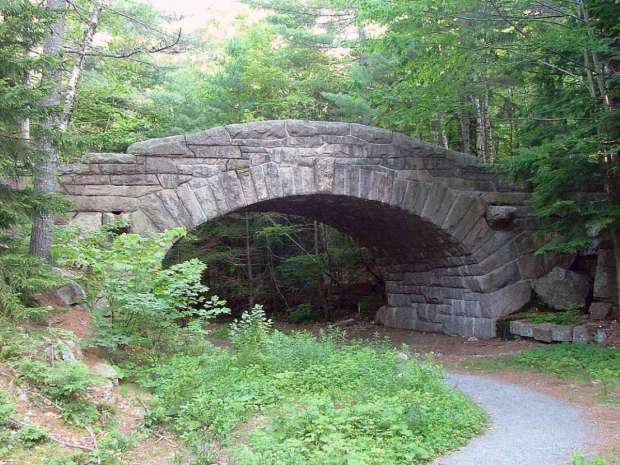
In the end, the Roman arch, with all its faults, is actually an excellent choice for a stone arch bridge; at least ones of reasonably small spans, such as culverts. The Roman arch can be easily built thick enough to free-stand in small structures, and has practically no outward thrust, and the weight of the fill helps push the line of thrust more within the arch, thereby serving to further strengthen an already stable structure. The end result is that the Roman arch can actually be a very durable shape, able to handle all manner of loading conditions with ease.
A line of thrust problem caused by the large amount of fill at the ends of the bridge relative to the keystone is rarely a problem in small- and medium-sized bridges.

Usually, the arches are so proportionately thick that any difference between the exact arch shape and that of the line of thrust poses but little problem. In very long spans, however, some means of lightening the excess weight on the ends of the arch often has to be resorted to; see The Challenge of Long-Span Arch Bridges for more details.
